In today’s digital age, efficient collaboration and seamless document management are vital for individuals and businesses alike. That is where Google Docs comes in. As a versatile online word-processing tool, Google Docs offers a plethora of features and functionalities that can revolutionize the way you work. In this comprehensive guide, we will explore the ins and outs of Google Docs, from login procedures to advanced formatting options. Let us dive in and unlock the full potential of Google Docs!
In this blog, we’ll explore:
- What are Google Docs?
- How to Login to Google Docs?
- How to Create Public Templates?
- Best Formatting & Styling to Use in Google Docs
- FAQs About Google Docs – Comprehensive List of Q & A
- Conclusion
What are Google Docs?
Google Docs is a web-based word-processing application developed by Google. It provides users with a powerful and collaborative platform for creating, editing, and storing documents online. With Google Docs, you can create distinct types of documents, including essays, reports, resumes, and more, all accessible from any device with an internet connection.
Unlike traditional desktop software, Google Docs operates entirely online, allowing for seamless collaboration and real-time editing. Multiple users can work on a document simultaneously, making it an excellent tool for team projects or remote collaboration. Additionally, all changes made to the document are automatically saved in real time, eliminating the fear of losing progress.
Google Docs offers a wide range of features and formatting options to enhance your document creation experience. From customizable templates and fonts to advanced editing tools and commenting features, it provides the necessary tools to create professional-looking documents with ease.
The integration of Google Drive, Google’s cloud storage service, allows you to store and access your documents securely from anywhere. It also enables easy sharing and collaboration, as you can grant distinct levels of access to individuals or teams.
Whether you are a student, professional, or someone looking for a user-friendly and versatile word processing solution, Google Docs offers a powerful set of tools that can significantly enhance your productivity and simplify document management.
How to Login to Google Docs?
To access the powerful features of Google Docs, you need to log in to your Google Account. Follow these simple steps to log in:
- Open Google Docs: Launch your web browser and navigate to the Google Docs website.
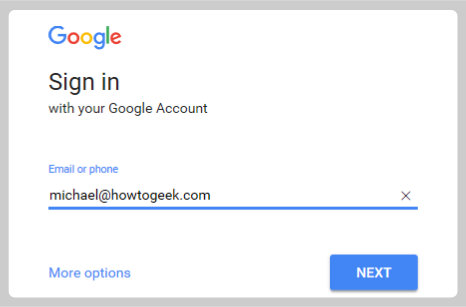
- Sign into Your Account: On the Google Docs homepage, click “Sign In” in the top-right corner of the screen.
- Enter Your Credentials: Enter your email address associated with your Google Account and click “Next.” Then, enter your password and click “Next” again.
- Verification (if prompted): Depending on your account settings, you may be required to go through additional security measures, such as entering a verification code sent to your registered mobile device or email.
- Access Google Docs: After successfully signing in, you will be redirected to the Google Docs homepage. Here, you can start creating, editing, and collaborating on documents.
Remember to keep your login credentials secure and avoid logging in to your Google Account on public or shared devices to protect your privacy and data.
How to Create Public Templates?
Google Docs allows you to create and share templates, which are pre-designed document formats that can be used as a starting point for various purposes. In this section, we will guide you through the process of creating public templates in Google Docs, so you can easily share them with others and promote collaboration. Let’s get started!
1. Accessing Templates
- Open Google Docs and sign into your Google account.
- Click on the “Template Gallery” icon at the top right corner of the homepage.
2. Creating a New Template
- In the Template Gallery, click on the “Submit a template” button at the top right corner.
- Choose the type of document you want to create a template for, such as a resume, report, or newsletter.
- Create your document using the formatting and styling options available in Google Docs. You can add text, images, tables, and other elements to customize the template according to your needs.
3: Adding Template Details
- Once your template is ready, click on the “File” menu and select “Document Details.”
- In the “Document Details” sidebar, provide a descriptive title for your template and add relevant tags to help others find it easily in the Template Gallery.
- Optionally, you can add a description to provide more information about the template’s purpose and usage.
4. Making the Template Public
- To make your template accessible to others, click on the “Share” button at the top right corner of the document.
- In the sharing settings, click on “Change” next to the document access permissions.
- Select “On – Public on the web” to make the template available to anyone who has the link or searches for it in the Template Gallery.
5. Submitting the Template
- After making the template public, review the template’s content and details to ensure everything is accurate and appropriate for sharing.
- Click on the “Submit” button to submit your template to Google for review. This step ensures that the template meets Google’s guidelines and quality standards.
- Once approved, your template will be available for others to discover and use in the Template Gallery.
By following these steps, you can create public templates in Google Docs and contribute to the growing collection of templates available to users worldwide. Sharing your templates not only helps others save time and effort but also highlights your creativity and expertise.
Best Formatting & Styling to Use in Google Docs
1. Headings and Styles
Headings and styles are essential for structuring your document and creating a clear hierarchy. Google Docs provides a range of heading styles that you can apply to your text. To use headings and styles:
- Select the desired text.
- Open the “Styles” drop-down menu in the toolbar.
- Choose the appropriate heading style for your text.
By using headings, you can organize your document and make it more reader friendly. It also helps in generating an automatic table of contents if needed.
2. Text Formatting
Google Docs offers various text formatting options to enhance the appearance of your content. You can make your text bold, italicize it, underline it, or change its font color. To format text:
- Select the text you want to format.
- Use the formatting options available in the toolbar to apply the desired formatting.
Experiment with different text formatting styles to highlight important points, emphasize key information, or create a visually appealing document.
3. Lists
Lists are useful for presenting information in an organized and structured manner. Google Docs supports both bulleted and numbered lists. To create a list:
- Place your cursor where you want the list to start.
- Click on the bulleted list icon or numbered list icon in the toolbar to create the desired list type.
- Enter your list items by pressing “Enter” after each item.
You can also create nested lists by using the increase indent and decrease indent icons. Lists help readers grasp information quickly and improve the overall readability of your document.
4. Tables
Tables are ideal for presenting data in a structured format. To insert a table:
- Go to the “Insert” menu.
- Select “Table.”
- Specify the number of rows and columns you need.
- Google Docs will insert a table into your document.
You can customize the appearance of the table by adjusting cell size, adding borders, and applying different table styles. Tables make it easier to organize and present data effectively.
5. Images
Images can enhance the visual appeal and convey information in a more engaging way. To insert an image:
- Go to the “Insert” menu.
- Select “Image.”
- Choose to upload an image from your device or insert an image from the web.
Once inserted, you can resize, position, and wrap text around the image for better integration. Use relevant images to support your content and make it visually appealing.
6. Hyperlinks
Hyperlinks allow you to add clickable links to external websites or other sections within your document. To insert a hyperlink:
- Select the text you want to link.
- Click on the “Insert” menu.
- Choose “Link.”
- Enter the URL or select a heading within the document to create an anchor link.
Hyperlinks provide additional resources or navigate readers to relevant information outside the document.
7. Page Layout
Google Docs offers page layout options to customize the appearance of your document. To access page layout options:
- Go to the “File” menu.
- Select “Page Setup.”
From there, you can adjust margins, change page orientation (portrait or landscape), and add headers and footers. Page layout options help you tailor your document to meet specific formatting requirements.
These formatting and styling options in Google Docs provide you with the flexibility to create visually appealing and well-structured documents. Experiment with different formatting techniques to make your content stand out and engage your readers effectively.
FAQs About Google Docs – Comprehensive List of Q & A
1. How to Change Margins in Google Docs?
Margins play a crucial role in document layout. To change margins in Google Docs, follow these steps:
- Open your document in Google Docs.
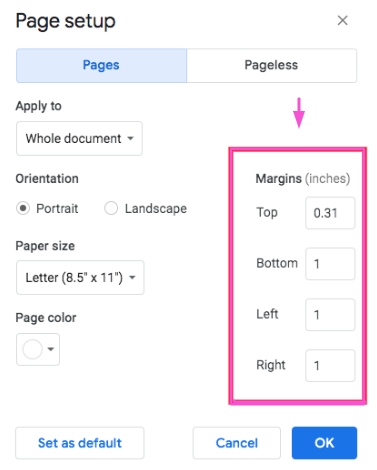
- Click on “File” in the menu bar and select “Page Setup.”
- In the Page Setup dialog box, you can adjust the margin values by entering specific measurements or using the predefined margin options.
- Once you’ve set your desired margins, click “OK” to apply the changes.
By customizing the margins, you can create documents that meet specific formatting requirements or achieve a visually appealing layout.
2. How to Delete a Page in Google Docs?
Sometimes, you may find yourself with an extra page in your document that you want to remove. To delete a page in Google Docs, follow these simple steps:
- Open your document in Google Docs.
- Place the cursor at the beginning of the page you want to delete.
- Press the “Backspace” or “Delete” key on your keyboard until the page is removed.
If you have unwanted blank pages or sections in your document, this quick technique will help you maintain a clean and professional appearance.
3. How to Do Hanging Indent on Google Docs?
A hanging indent is commonly used in academic papers, bibliographies, and reference lists. To apply a hanging indent in Google Docs, follow these steps:
- Open your document in Google Docs.
- Select the text you want to format with a hanging indent.
- Click on the “Format” menu in the menu bar and choose “Paragraph styles”> “Indents and spacing.”
- In the Indents and Spacing dialog box, locate the “Special” drop-down menu and select “Hanging.”
- Adjust the “By” value to determine the amount of indent you want.
- Click “Apply” to apply the hanging indent formatting.
With this formatting technique, you can ensure consistent and professional indentation in your documents.
4. How to Double Space in Google Docs?
Double spacing is often required in academic or professional documents to enhance readability and allow for easier editing. To double space in Google Docs, follow these steps:
- Open your document in Google Docs.
- Select the text you want to format with double spacing or place the cursor at the beginning of the document to apply it to the entire text.
- Click on the “Format” menu in the menu bar and choose “Line spacing.”
- Select “Double” from the options available.
By applying double spacing, you can create documents that adhere to standard formatting guidelines and are easier to read.
5. How to Strikethrough on Google Docs?
Strikethrough formatting is useful when you want to indicate deleted or no longer relevant text. To apply strikethrough formatting in Google Docs, follow these steps:
- Open your document in Google Docs.
- Select the text you want to format with strikethrough or place the cursor at the beginning of the document to apply it to the entire text.
- Click on the “Format” menu in the menu bar and choose “Text”> “Strikethrough.”
With strikethrough formatting, you can visually indicate changes or emphasize crossed-out information in your documents.
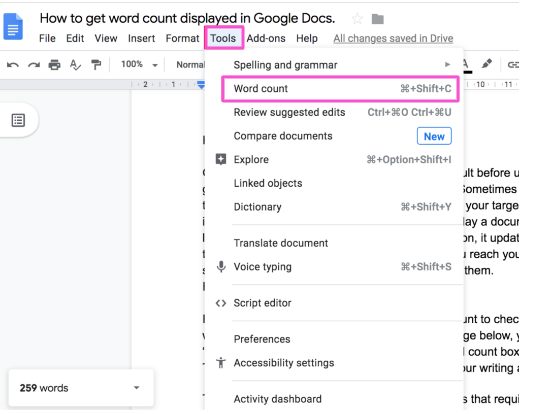
6. How to Check Word Count on Google Docs?
Monitoring the word count is essential for meeting word limits or tracking your progress while writing. To check the word count in Google Docs, follow these steps:
- Open your document in Google Docs.
- Click on the “Tools” menu in the menu bar and select “Word count.”
- A dialog box will appear, displaying the number of pages, words, characters (with and without spaces), and other relevant information.
By keeping an eye on the word count, you can ensure your document aligns with specific requirements and effectively manage your writing.
7. How to Insert Text Box in Google Docs?
Text boxes are versatile tools for adding emphasis or organizing information within your document. To insert a text box in Google Docs, follow these steps:
- Open your document in Google Docs.
- Click on the “Insert” menu in the menu bar and select “Drawing.”
- In the Drawing tool, click on the “Text box” icon and drag your cursor to draw the text box on your document.
- Enter the desired text within the text box.
- Customize the text box’s appearance by adjusting the font, size, color, and alignment using the options available in the toolbar.
- Click “Save and close” to insert the text box into your document.
With text boxes, you can highlight essential information, create visually appealing designs, or organize content in a structured manner.
8. How to Add Page Numbers in Google Docs?
Page numbers provide a clear structure to your document, making it easier for readers to navigate through its contents. To add page numbers in Google Docs, follow these steps:
- Open your document in Google Docs.
- Click on the “Insert” menu in the menu bar and select “Page number.”
- Choose the desired location for the page numbers: top of the page, bottom of the page, or page margins.
- Google Docs will automatically add the page numbers to your document.
By incorporating page numbers, you can enhance the professionalism and readability of your document.
9. How to Cross Out Text in Google Docs?
Sometimes, you may want to emphasize that certain information is no longer relevant or needs to be removed from your document. In Google Docs, you can easily cross out text to indicate its deletion. Here’s how:
- Select the text you want to cross out.
- Go to the “Format” menu at the top.
- Choose “Text” and then click on “Strikethrough.”
The selected text will now appear with a line through it, indicating that it’s crossed out. This formatting option is useful for showing revisions or indicating changes in your document.
10. How to Subscript in Google Docs?
Subscripts are commonly used for mathematical formulas, chemical equations, or footnotes. In Google Docs, adding subscripts to your text is a breeze. Follow these steps:
- Highlight the text or character that you want to convert to subscript.
- Right-click on the selected text and choose “Format” from the context menu.
- Click on “Text” and then select “Subscript.”
The text will now appear slightly below the baseline, indicating that it’s in subscript format. This feature is particularly handy when dealing with scientific or technical writing.
11. How to Draw on Google Docs?
If you want to add annotations, diagrams, or sketches to your Google Docs document, you can utilize the drawing tool. Here’s how to access it:
- Go to the “Insert” menu at the top.
- Select “Drawing” and choose “New.”
- A drawing window will appear, allowing you to create and edit your drawing.
You can use various drawing tools, including lines, shapes, and freehand drawing, to illustrate your ideas. Once you’re done, you can insert the drawing into your document or save it separately.
12. How to Search for a Word in Google Docs?
When working with lengthy documents, finding specific words or phrases can be time-consuming. Fortunately, Google Docs offers a powerful search function to help you locate information quickly. Follow these steps to search for a word or phrase:
- Open your document in Google Docs.
- Press “Ctrl + F” (Windows) or “Command + F” (Mac) on your keyboard.
- A search bar will appear at the top right corner of the document.
- Enter the word or phrase you want to find.
- Google Docs will highlight all instances of the search term in the document.
You can navigate through the search results using the arrow buttons in the search bar. This feature is invaluable for large documents or when you need to locate specific information.
13. How to Turn a PDF into a Word Doc?
If you have a PDF file that you need to edit or work with in Microsoft Word, you can convert it into a Word document. This allows you to make changes, format the text, or add updated content. Here’s how you can convert a PDF into a Word document:
- Open Microsoft Word.
- Go to the “File” tab and choose “Open.”
- Select the PDF file you want to convert.
- Word will display a prompt asking if you want to convert the PDF. Click “OK” to proceed.
- The PDF file will be converted into a Word document, and you can now edit and modify it as needed.
Converting a PDF into a Word document gives you more flexibility and control over the content, making it easier to collaborate and make changes.
14. How to Alphabetize in Google Docs?
Organizing information alphabetically is a common task, especially when dealing with lists or tables in Google Docs. Alphabetizing your content can help improve readability and make it easier for readers to locate specific items. Follow these steps to alphabetize your content in Google Docs:
- Select the text or cells that you want to alphabetize.
- Go to the “Table” menu (if working with a table) or the “Edit” menu (if working with regular text).
- Choose the “Sort” option from the menu.
- A dialog box will appear, allowing you to specify the sorting criteria.
- Select the appropriate options, such as sorting by paragraphs, columns, or rows.
- Choose whether you want the sorting to be in ascending or descending order.
- Click on the “Sort” button to alphabetize the selected content.
Google Docs will rearrange the selected text or cells in alphabetical order based on the chosen sorting criteria. This feature is particularly useful for sorting lists, contact information, or any other content that needs to be organized alphabetically.
15. How to Make Google Docs Dark Mode? A Stylish Twist
If you prefer a darker interface for a more visually pleasing and comfortable working environment, you’ll be delighted to know that Google Docs offers a dark mode option. Here’s how you can enable dark mode in Google Docs:
- Open Google Docs in your web browser.
- Go to the “View” menu at the top.
- Select “Dark Mode” from the menu.
- The interface will now switch to a dark color scheme.
By enabling dark mode, the background of your Google Docs window will turn dark, making it easier on the eyes, especially in low-light conditions. Enjoy the sleek and stylish look of your documents as you work!
16. How to Use Google Docs? A Beginner’s Guide
If you’re new to Google Docs, getting started may seem a bit overwhelming. However, with this beginner’s guide, you’ll be up and running in no time. Here are the basic steps to help you use Google Docs effectively:
- Access Google Docs by opening your web browser and navigating to docs.google.com.
- Sign into your Google account or create a new one if you don’t have an account yet.
- Click on the “Blank” document to create a new document or choose from the available templates.
- Familiarize yourself with the toolbar, which contains various formatting and editing options.
- Start typing your content in the document.
- Use the toolbar to format text, add headings, create lists, insert images, and more.
- Explore the “File” menu to perform actions such as saving, printing, or sharing your document.
- Collaborate with others by clicking on the “Share” button in the top-right corner.
- Customize your document by adjusting page settings, adding headers and footers, or changing the document’s appearance.
- Use the “Tools” menu to access additional features, such as spell check, word count, and translation.
- Save your document regularly to ensure your work is not lost.
With these basic steps, you’ll have a solid foundation for using Google Docs. As you become more comfortable with the platform, you can explore advanced features and functionality to enhance your document creation experience. Happy documenting!
17. How do you add Grammarly to Google Docs?
Grammarly is a popular writing tool that helps improve grammar, spelling, and style. Integrating Grammarly with Google Docs allows you to enhance your writing directly within the document. Here’s how you can add Grammarly to Google Docs:
- Open Google Docs in your web browser.
- Go to the “Add-ons” menu at the top.
- Select “Get add-ons” from the dropdown menu.
- In the add-ons window, search for “Grammarly” in the search bar.
- Click on the “Grammarly for Chrome” add-on.
- A new window will open with the Grammarly add-on page.
- Click on the “Free” button to install the add-on.
- Grant the necessary permissions for Grammarly to access your Google Docs.
- Once the installation is complete, you will see the Grammarly icon in the top-right corner of your Google Docs window.
- Start writing or editing your document, and Grammarly will automatically highlight potential grammar, spelling, and style issues.
- Click on the highlighted areas to see Grammarly’s suggestions and corrections.
- Make the necessary changes or improvements to your writing based on Grammarly’s recommendations.
With Grammarly integrated into Google Docs, you can enhance the quality and accuracy of your writing. It’s a valuable tool for writers, students, professionals, and anyone who wants to improve their writing skills.
18. How to Add Header in Google Docs?
Headers are useful for adding consistent information at the top of each page in your Google Docs document. Here’s how you can add a header:
- Open your Google Docs document.
- Go to the “Insert” menu at the top.
- Select “Header” from the dropdown menu.
- Choose the desired header style from the available options, such as a simple header or a page number header.
- The header section will appear at the top of your document.
- Click inside the header section to start typing or insert elements like text, images, or page numbers.
- Customize the header by formatting the text, adjusting the alignment, or applying styles.
Adding a header to your Google Docs document provides a professional and organized appearance, especially for multi-page documents or reports.
19. How to Add Headings in Google Docs?
Headings help structure your document and make it easier to navigate. Here’s how you can add headings in Google Docs:
- Open your Google Docs document.
- Select the text that you want to turn into a heading.
- Go to the “Format” menu at the top.
- Hover over the “Paragraph styles” option.
- A drop down menu will appear with various heading styles.
- Choose the appropriate heading style for your selected text.
- The selected text will now appear as a heading with the applied style.
By using headings, you can create a clear hierarchy within your document, making it more organized and reader-friendly.
20. How to Add a Signature in Google Docs?
Adding a signature to your Google Docs document gives it an individualized touch and authenticity. Here’s how you can add a signature:
- Open your Google Docs document.
- Place the cursor where you want to insert the signature.
- Go to the “Insert” menu at the top.
- Select “Drawing” from the dropdown menu.
- A drawing canvas will open.
- Use the tools provided to draw your signature.
- Once you’re satisfied with your signature, click on the “Save and close” button.
- The drawing of your signature will be inserted into your Google Docs document.
- Resize or reposition the signature as needed.
21. How to Change Page Color in Google Docs?
Changing the page color in Google Docs can help enhance the visual appeal and create a customized look for your documents. Here’s how you can change the page color:
- Open your Google Docs document.
- Go to the “File” menu at the top.
- Select “Page setup” from the dropdown menu.
- In the “Page setup” window, click on the “Page color” dropdown menu.
- Choose a color from the available options or click on “Custom” to select a specific color.
- If you select “Custom,” a color picker will appear where you can choose the desired color by adjusting the hue, saturation, and brightness slides.
- Once you’ve selected the desired color, click “OK” to apply it to your document.
- The page color will change accordingly.
Changing the page color can be helpful when creating invitations, brochures, or any document where visual aesthetics play a crucial role.
22. How to Do MLA Format on Google Docs?
MLA (Modern Language Association) format is commonly used for academic papers, essays, and research documents. Here’s how you can apply MLA format to your Google Docs document:
- Open your Google Docs document.
- Go to the “Format” menu at the top.
- Select “Paragraph styles” from the dropdown menu.
- Click on “Heading” to apply the appropriate heading style for your document title.
- Press Enter to move to the next line.
- Go to the “Format” menu again.
- Select “Paragraph styles” and click on “Normal text” to apply the default text style.
- Start typing your content in the normal text style.
- Follow the MLA guidelines for formatting your document, such as using double spacing, 1-inch margins, and a readable font (e.g., Times New Roman, size 12).
- Use the “Format” menu for additional formatting options, such as indentation, alignment, and line spacing.
By applying MLA format to your Google Docs document, you ensure that it meets the specific requirements and standards of academic writing.
23. How to Duplicate a Word Doc?
Duplicating a Word doc in Google Docs allows you to create a copy of an existing document without modifying the original. Here’s how you can duplicate a Word doc:
- Open the Word document you want to duplicate.
- Go to the “File” menu at the top.
- Select “Make a copy” from the dropdown menu.
- A new window will open, asking you to enter a name for the duplicated document.
- Enter a suitable name for the duplicated document.
- Choose the desired location where you want to save the duplicated document (e.g., My Drive, a specific folder).
- Click on the “OK” button to create the duplicate.
- The duplicated document will open, and you can start editing it without affecting the original document.
Duplicating a Word doc in Google Docs allows you to work on multiple versions or make edits without the risk of altering the original content.
24. How to Save Google Docs as PDFs?
Saving your Google Docs document as a PDF file can be useful when you want to share or print the document while preserving the formatting and layout. Here’s how you can save a Google Doc as a PDF:
- Open your Google Docs document.
- Go to the “File” menu at the top.
- Select “Download” from the dropdown menu.
- A submenu will appear with various file format options.
- Choose “PDF document” from the submenu.
- The document will be downloaded as a PDF file to your computer’s default download location.
- Locate the downloaded PDF file on your computer and verify that it has been saved correctly.
Saving your Google Docs document as a PDF ensures that it can be easily shared with others, regardless of the software or device they are using. PDF files are widely compatible and maintain the document’s formatting and layout, making them suitable for printing or digital distribution.
25. How to Use Add-ons in Google Docs?
Add-ons are powerful tools that extend the functionality of Google Docs by adding new features and capabilities. Here’s how you can use add-ons in Google Docs:
- Open your Google Docs document.
- Go to the “Add-ons” menu at the top.
- Select “Get add-ons” from the dropdown menu.
- The add-ons window will open, displaying a variety of available add-ons.
- Browse through the various categories or use the search bar to find specific add-ons.
- Click on an add-on to view more details and its reviews.
- Once you’ve found an add-on you want to install, click on the “+ Free” or “Upgrade” button.
- Grant the necessary permissions for the add-on to access your Google Docs.
- The add-on will be installed and appear under the “Add-ons” menu.
- Follow the instructions provided by the add-on to use its features and functions.
Add-ons can help streamline your workflow, enhance collaboration, and provide additional tools for tasks such as citations, language translation, project management, and more. Explore the add-ons available in the Google Docs ecosystem to find ones that suit your specific needs.
26. How to Save in Google Docs?
Saving your work regularly in Google Docs is crucial to ensure that your progress is not lost. Google Docs has an autosave feature that automatically saves your changes as you work. However, it’s still important to know how to manually save your document. Here’s how you can save in Google Docs:
- While editing your Google Docs document, go to the “File” menu at the top.
- Select “Save” or “Save as” from the dropdown menu.
- If you choose “Save,” your document will be saved with its existing name and location.
- If you choose “Save as,” a new window will open, allowing you to specify a different name and location for your document.
- Enter the desired name for your document, if applicable.
- Choose the location where you want to save your document, such as “My Drive” or a specific folder.
- Click on the “Save” or “Save as” button to save your document.
By saving your document in Google Docs, you ensure that your changes are preserved and accessible for future editing or sharing.
27. How to Add Footnotes in Google Docs?
Footnotes are useful for providing additional information or citing sources within your document. Here’s how you can add footnotes in Google Docs:
- Open your Google Docs document.
- Place the cursor where you want to insert the footnote.
- Go to the “Insert” menu at the top.
- Select “Footnote” from the dropdown menu.
- A footnote section will appear at the bottom of the page, and a superscript number will be added at the cursor position in the main text.
- Type the content of the footnote in the footnote section.
- To return to the main text, click anywhere in the main text or press the “Enter” key.
Adding footnotes allows you to provide additional context, explanations, or references to support your document’s content.
28. How to Convert PDF to Google Doc?
Converting a PDF file to a Google Docs document allows you to edit and work with the content more effectively. Here’s how you can convert a PDF to a Google Doc:
- Open Google Drive in your web browser.
- Click on the “+ New” button on the left-hand side.
- Select “File upload” from the dropdown menu.
- Choose the PDF file you want to convert from your computer.
- The PDF file will be uploaded to your Google Drive.
- Right-click on the uploaded PDF file in Google Drive.
- Select “Open with” from the options.
- Choose “Google Docs” from the submenu.
- A new Google Docs document will open, containing the converted content from the PDF.
- You can now edit and work with the content as you would with any Google Docs document.
Converting a PDF to a Google Doc provides you with the flexibility to edit, collaborate, and format the content more easily.
29. How to Make a Brochure on Google Docs?
Creating a brochure in Google Docs allows you to design and share visually appealing documents. Here’s how you can make a brochure:
- Open Google Docs in your web browser.
- Go to the “Template Gallery” by clicking on “Template Gallery” in the top-right corner or selecting “Template Gallery” from the “File” menu.
- In the template gallery, search for “brochure” in the search bar.
- Browse the available brochure templates and choose the one that suits your needs.
- Click on the chosen template to open it in a new Google Docs document.
- Customize the brochure by replacing the placeholder text and images with your own content.
- Modify the design elements such as colors, fonts, and layouts to match your desired style.
- Add sections, images, headings, and other elements to create an engaging and informative brochure.
- Save your brochure and share it digitally or print it as needed.
30. How to Make a Table of Contents in Google Docs?
Creating a table of contents in Google Docs helps organize your document and enables easy navigation for readers. Here’s how you can make a table of contents:
- Open your Google Docs document.
- Place the cursor where you want to insert the table of contents.
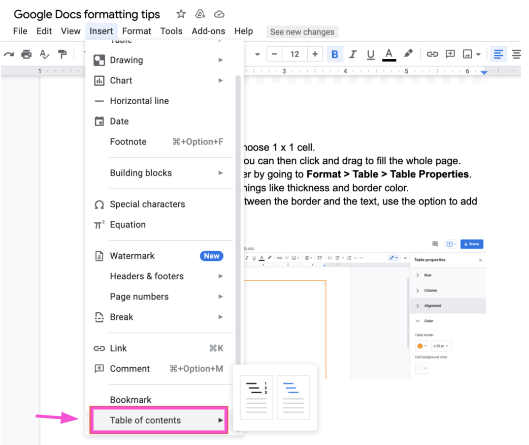
- Go to the “Insert” menu at the top.
- Select “Table of contents” from the dropdown menu.
- Choose either “With blue links” or “With links styled like headings” based on your preference.
- The table of contents will be inserted into your document, automatically generating links to headings and subheadings.
- If you make changes to your document’s structure or headings, the table of contents will update automatically.
A table of contents makes it easier for readers to navigate through your document, especially for lengthy reports, research papers, or books.
31. How to Track Changes in Google Docs?
Tracking changes in Google Docs allows collaborators to see and review modifications made to a document. Here’s how you can track changes:
- Open your Google Docs document.
- Go to the “Tools” menu at the top.
- Select “Review suggested edits” from the dropdown menu.
- A sidebar will appear on the right-hand side.
- In the sidebar, click on the toggle switch for “Suggesting” mode.
- Make edits or changes to the document, and your modifications will appear as suggestions.
- Collaborators can view and accept/reject the suggested edits.
- To review the changes made by collaborators, go to the “Tools” menu again.
- Select “Review suggested edits” from the dropdown menu.
- The sidebar will display the suggested edits made by collaborators.
- Review each suggestion and choose to accept or reject it by clicking on the corresponding buttons.
Tracking changes in Google Docs facilitates collaboration, revision, and feedback processes, making it easier to work on documents with multiple contributors.
32. How to Create a Folder in Google Docs?
Creating folders in Google Docs helps you organize and manage your documents efficiently. Here is how you can create a folder:
- Open your Google Docs homepage or the Drive.
- Click on the “New” button located on the left-hand side.
- A dropdown menu will appear.
- Select “Folder” from the menu.
- A new folder will be created with a default name, such as “New folder.”
- Enter a suitable name for the folder.
- Press Enter to save the folder name.
- The folder will be created in your Google Docs or Drive, depending on where you initiated the creation process.
- To move documents into the folder, select the desired documents, right-click, and choose “Move to” from the options.
- Select the folder you created to move the documents into it.
Creating folders in Google Docs helps keep your documents organized, making it easier to locate and manage files.
33. How to Delete a Blank Page in Google Docs?
Deleting a blank page in Google Docs is necessary when you have an extra or unwanted page that you want to remove. Here is how you can delete a blank page:
- Open your Google Docs document.
- Place the cursor at the end of the content on the page preceding the blank page.
- Press the Backspace or Delete key on your keyboard repeatedly until the blank page is removed.
- Alternatively, you can place the cursor on the blank page itself and press the Backspace or Delete key until the page is deleted.
- Keep pressing the key until the page disappears, and the content adjusts accordingly.
Deleting a blank page ensures that your document does not contain unnecessary or empty pages, providing a clean and professional appearance.
34. How to Download a Google Doc?
Downloading your Google Docs document allows you to save a copy to your computer or device for offline access or sharing. Here is how you can download a Google Doc:
- Open your Google Docs document.
- Go to the “File” menu at the top.
- Select “Download” from the dropdown menu.
- A submenu will appear with various file format options.
- Choose the desired file format based on your needs, such as:
- “Microsoft Word (.docx)” to download as a Word document.
- “PDF Document (.pdf)” to download as a PDF file.
- “Plain Text (.txt)” to download as a plain text file.
- “Rich Text (.rtf)” to download as a rich text format file.
- “Web Page (.html, zipped)” to download as a zipped HTML file.
- Click on the preferred file format to start the download.
- Choose a location on your computer or device to save the downloaded file.
- Click “Save” or “OK” to save the file to the selected location.
Once the download is complete, you can access the Google Docs document offline or share it with others as needed.
Downloading Google Docs provides you with more flexibility in how you use and share your documents, ensuring accessibility even without an internet connection.
35. How to Flip an Image in Google Docs?
Flipping an image in Google Docs allows you to reverse the orientation of the image horizontally or vertically. Here is how you can flip an image in Google Docs:
- Open your Google Docs document.
- Insert an image by going to the “Insert” menu at the top and selecting “Image.”
- Choose the image you want to flip from your local files, Google Drive, or by entering the image URL.
- Once the image is inserted, click on the image to select it.
- In the toolbar that appears above the image, click on the “Format options” icon (represented by a paint roller).
- In the “Image options” sidebar that opens on the right side of the document, navigate to the “Rotate” section.
- To flip the image horizontally, click on the “Flip horizontally” button.
- To flip the image vertically, click on the “Flip vertically” button.
- The image will be instantly flipped according to your selected orientation.
By following these steps, you can easily flip images in Google Docs to achieve the desired visual effect or arrangement.
About Automa8e:

Automa8e is an AI-powered accounting software and document management solution that empowers businesses in Singapore by delivering invaluable information and practical guides for a wide range of business functions and day-to-day operations. At Automa8e, our mission is to provide businesses with the knowledge and insights necessary to make intelligent decisions, enabling them to thrive and succeed. We are committed to sharing valuable information and aim to be the trusted partner that empowers businesses to achieve their goals through informed decision-making. With our comprehensive suite of tools and resources, we are dedicated to supporting businesses in Singapore on their path to success. Schedule a call now and discover how Automa8e can add value to your business.