User management is a pivotal organizational function that plays a crucial role in accounting software systems. This function empowers users to access and control digital assets such as accounting applications, devices, networks, and cloud services. In today’s dynamic business landscape, modern user management services have evolved to encompass end-to-end management of user accounts, including user registration, login and authentication, single sign-on (SSO), and permissions management, all of which are vital in the context of accounting software.
In this blog, we’ll explore:
- User Management in Accounting Software
- Key Components of User Management in Accounting Software
- Best Practices in User Management for Accounting Software
- Benefits of User Management in Accounting Software
- User Management with Automa8e: A Step-by-Step Guide
- Conclusion
User Management in Accounting Software
User management in accounting software is central to ensuring the security, efficiency, and accuracy of financial data and processes. It encompasses several key components and best practices that are essential for organizations.
Key Components of User Management in Accounting Software
- User Roles: In accounting software, different user roles are defined, such as administrators, accountants, bookkeepers, and auditors. These roles come with varying levels of access and privileges, aligning with the specific needs and responsibilities of each user.
- Permissions: Permissions dictate what actions each user can perform within the software. Whether it’s read-only access or full control over financial transactions, these permissions ensure that users can access the necessary functions while protecting sensitive data.
- Authentication: Robust authentication methods like usernames and passwords, two-factor authentication (2FA), or biometrics are employed to guarantee that only authorized users can access the accounting software.
- User Onboarding and Offboarding: Streamlined processes for adding new users and deactivating departing employees reduce the risk of unauthorized access and ensure that the software remains up to date.
- Audit Trails: Accounting software maintains detailed audit trails that record all user actions and changes to financial data. These logs are vital for tracking changes, resolving discrepancies, and ensuring transparency.
Best Practices in User Management for Accounting Software
- Least Privilege Principle: Grant users the minimum level of access required for their tasks to minimize the risk of unauthorized data manipulation.
- Regular Reviews: Periodic reviews of user accounts and permissions are essential to ensure they remain appropriate and up to date, reducing the risk of security breaches.
- Password Policies: Enforce strong password policies, including regular password changes and complex requirements, to enhance security.
- Training and Awareness: Educate users about secure login practices and data security, encouraging them to report any suspicious activities.
- Data Encryption: Ensure that data at rest and in transit is encrypted to protect financial information from unauthorized access.
Benefits of User Management in Accounting Software
User management in accounting software provides numerous benefits that contribute to a well-functioning financial ecosystem within an organization:
- Enhanced Security: Robust user management minimizes the risk of data breaches and fraud by controlling access to financial data. Mitigate the risk of data breaches and fraud by controlling who has access to financial data and what they can do with it.
- Operational Efficiency: Efficient user management streamlines daily accounting operations by simplifying access and permissions, allowing users to focus on their tasks. Efficient user management facilitates the day-to-day activities of your finance team by simplifying access and permissions.
- Compliance: Align accounting practices with industry-specific regulations, reducing the risk of legal issues and penalties. Easily align your accounting practices with industry-specific regulations, thereby avoiding legal issues and penalties.
- Accountability: Detailed audit trails enable organisations to hold users accountable for their actions and maintain transparency. Track all user actions, allowing for accountability and transparency within the organization.
- Data Accuracy: By preventing unauthorized changes and ensuring the right people have access to the right information, user management maintains the integrity of financial data. Maintain the integrity of financial data by preventing unauthorized changes and ensuring that the right people have access to the right information
User Management with Automa8e: A Step-by-Step Guide
Managing users efficiently is a fundamental aspect of using Automa8e. This user management guide will walk you through the process of creating and managing users, roles, data ownership, and navigating the user management interface.
Using the Recommended Browser For the best experience, we recommend using Google Chrome as your default browser when working with Automa8e.
Creating a New User
- Click on “Create User” at the top right corner or “Add User” at the bottom of the page.
- Enter the user’s details, including their name, email, password (which must be at least eight characters with a mix of alphanumeric, special characters, and capital letters), mobile number, location, job title, and the user’s starting date on Automa8e.
- Click “Send Invite” to send an email invitation to the user. The user’s status will be “pending.”
Resending or Canceling Invitations For users who have not accepted the invitation, you can click on the three dots under “Action” and choose the option to resend or cancel the invitation.
Managing Users
- To manage users, click on the three dots under “Action” and select from the following options:
- View User Activity
- Edit User Details and Roles
- Terminate User
Viewing a User’s Activity By selecting “View User Activity,” you can access a log of all activities performed by the user.
Editing User Details and Roles Choose “Edit User Details and Roles” to view and modify the user’s details. Make the necessary changes, click “Edit,” and the profile will be updated.
Terminating a User To terminate a user, click on “Terminate User” and select the reason from the dropdown menu. Confirm by clicking “Yes, Terminate User.” The termination date will be reflected in the user’s details.
Reactivating a User You can re-activate a user by clicking the three dots and selecting “Re-activate User.” The termination date will disappear, and the user will regain access.
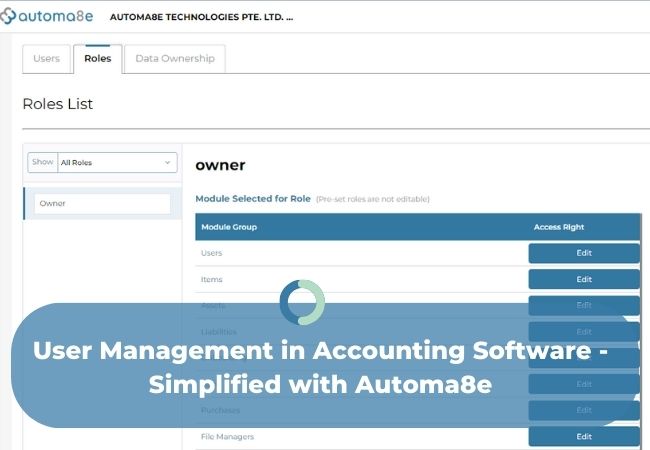
Creating a Role
- After creating a user, it’s essential to assign a role. Click on the “Roles” tab at the top of the page.
- Click “Create” on the right.
- Provide a role name and assign modules to the user to grant specific access. You can define viewing, editing, or no access for each module.
- Module selections will be auto-populated when you choose a module for view or edit.
- Click “Save” to create the role.
Assigning a Role – Option 1
- Under the “Roles” tab, select the role you want to assign.
- Click “+Add User.”
- Choose the relevant email ID by checking the box and clicking “Add User.” The user’s role is now assigned.
Assigning a Role – Option 2 (while creating a User)
- Click on the “User” tab.
- Assign roles while creating a user by enabling the role from the “Assign Role” list.
- Click “Send Invite.” This can be done if the role is already created.
Assigning Data Ownership Data ownership typically belongs to the person who created the company. You can add more data owners or transfer ownership as needed.
Adding Data Owner
- Select the name you want to add as an owner and click “Add Data Owner.”
Transferring Ownership
- Click on the dropdown arrow next to “Add Data Owner” and select “Transfer Ownership.”
- Choose the email ID to which you want to transfer ownership and click “Transfer Ownership.” Ownership will transfer, but you’ll still have access to the data.
Terminating a Data Owner You can terminate a data owner by clicking on the three dots and selecting “Terminate Data Owner.” The termination date will appear once the owner is terminated.
Navigating User Management
You can search for a user by their name or email ID using the search bar. Additionally, you can filter users by selecting options from the dropdown menu.
Showing/ Hiding Columns
Customize your display by clicking “Show/Hide Columns” on the left. Select the columns you want to display.
Conclusion
Managing users effectively is crucial for optimizing your experience with Automa8e. By following these steps and utilizing the user management features, you can ensure that your team has the right access and permissions, creating a smoother and more efficient workflow within the platform. User management is a fundamental function in accounting software that significantly impacts the security, efficiency, and overall functionality of financial processes.
By adhering to best practices and leveraging the benefits of robust user management, organizations can confidently manage their financial data and ensure it remains secure and accurate. As technology continues to evolve, user management will play an increasingly critical role in the world of accounting software, adapting to the changing needs and demands of modern businesses. User management in accounting software is an essential component for businesses of all sizes.
It not only bolsters the security and integrity of financial data but also streamlines operations and ensures compliance with industry regulations. By following best practices and leveraging the benefits of robust user management, organizations can confidently manage their finances in an increasingly digital world.